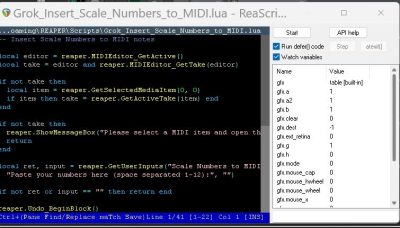
I wanted this, for helping with my new hobby of 12-tone Serialism music. I use Reaper as my DAW.
There is a little coding window in Reaper, but it doesn’t “vibe code.” I am almost positive that Reaper (thankfully) will never contain AI functions, knowing how Justin operates.
However, I did recently vibe code a function in Reaper via Grok. entering the Grok result into Reaper using the built-in Reaper actions / effects coding environment, JSFX (often just called “JS”) / Jesusonic (or JesuSonic)
I told Grok what I needed, it gave me the code, I entered into Reaper, tested, asked for an improvement, tested, and was done.
Worked great.
It’s NOT in any way “AI music” (which I would never do), it’s AI helping with the backend of the tools.
In the same way that if a guy works on your guitar to make it play better, he isn’t a member of your band.
EXAMPLES OF 12-TONE SERIAL MUSIC I DID, WITH THIS AS A STARTING POINT:
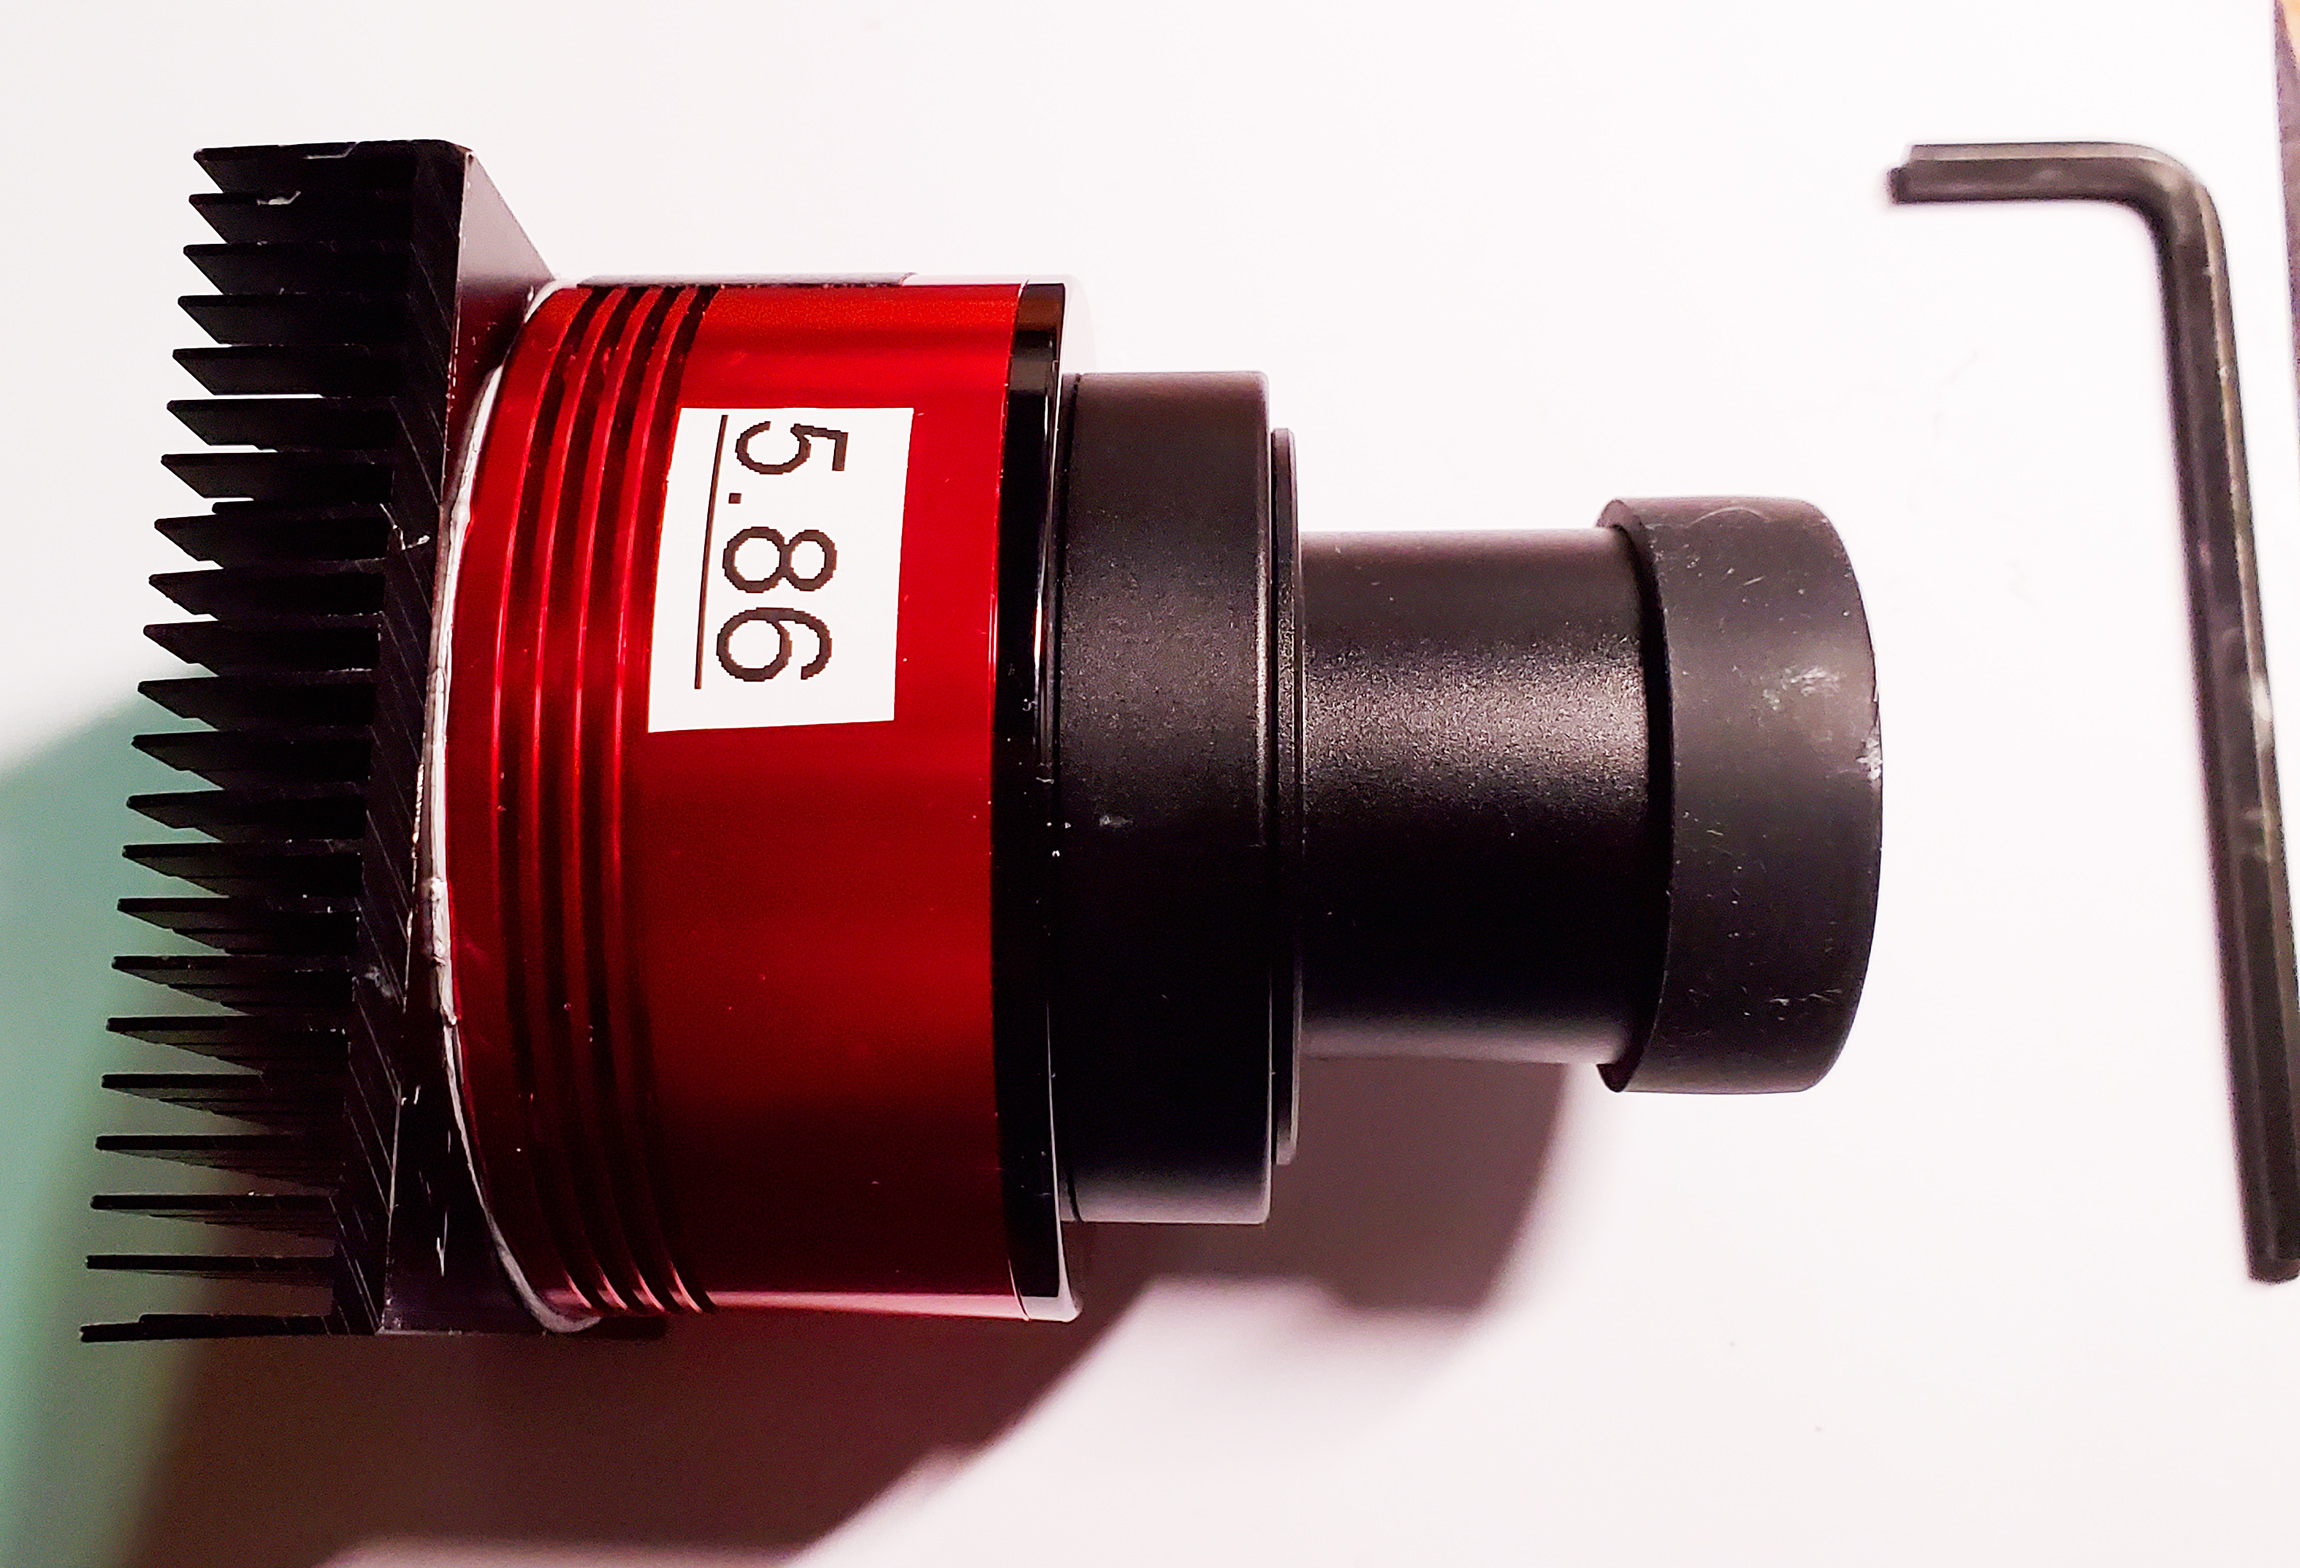
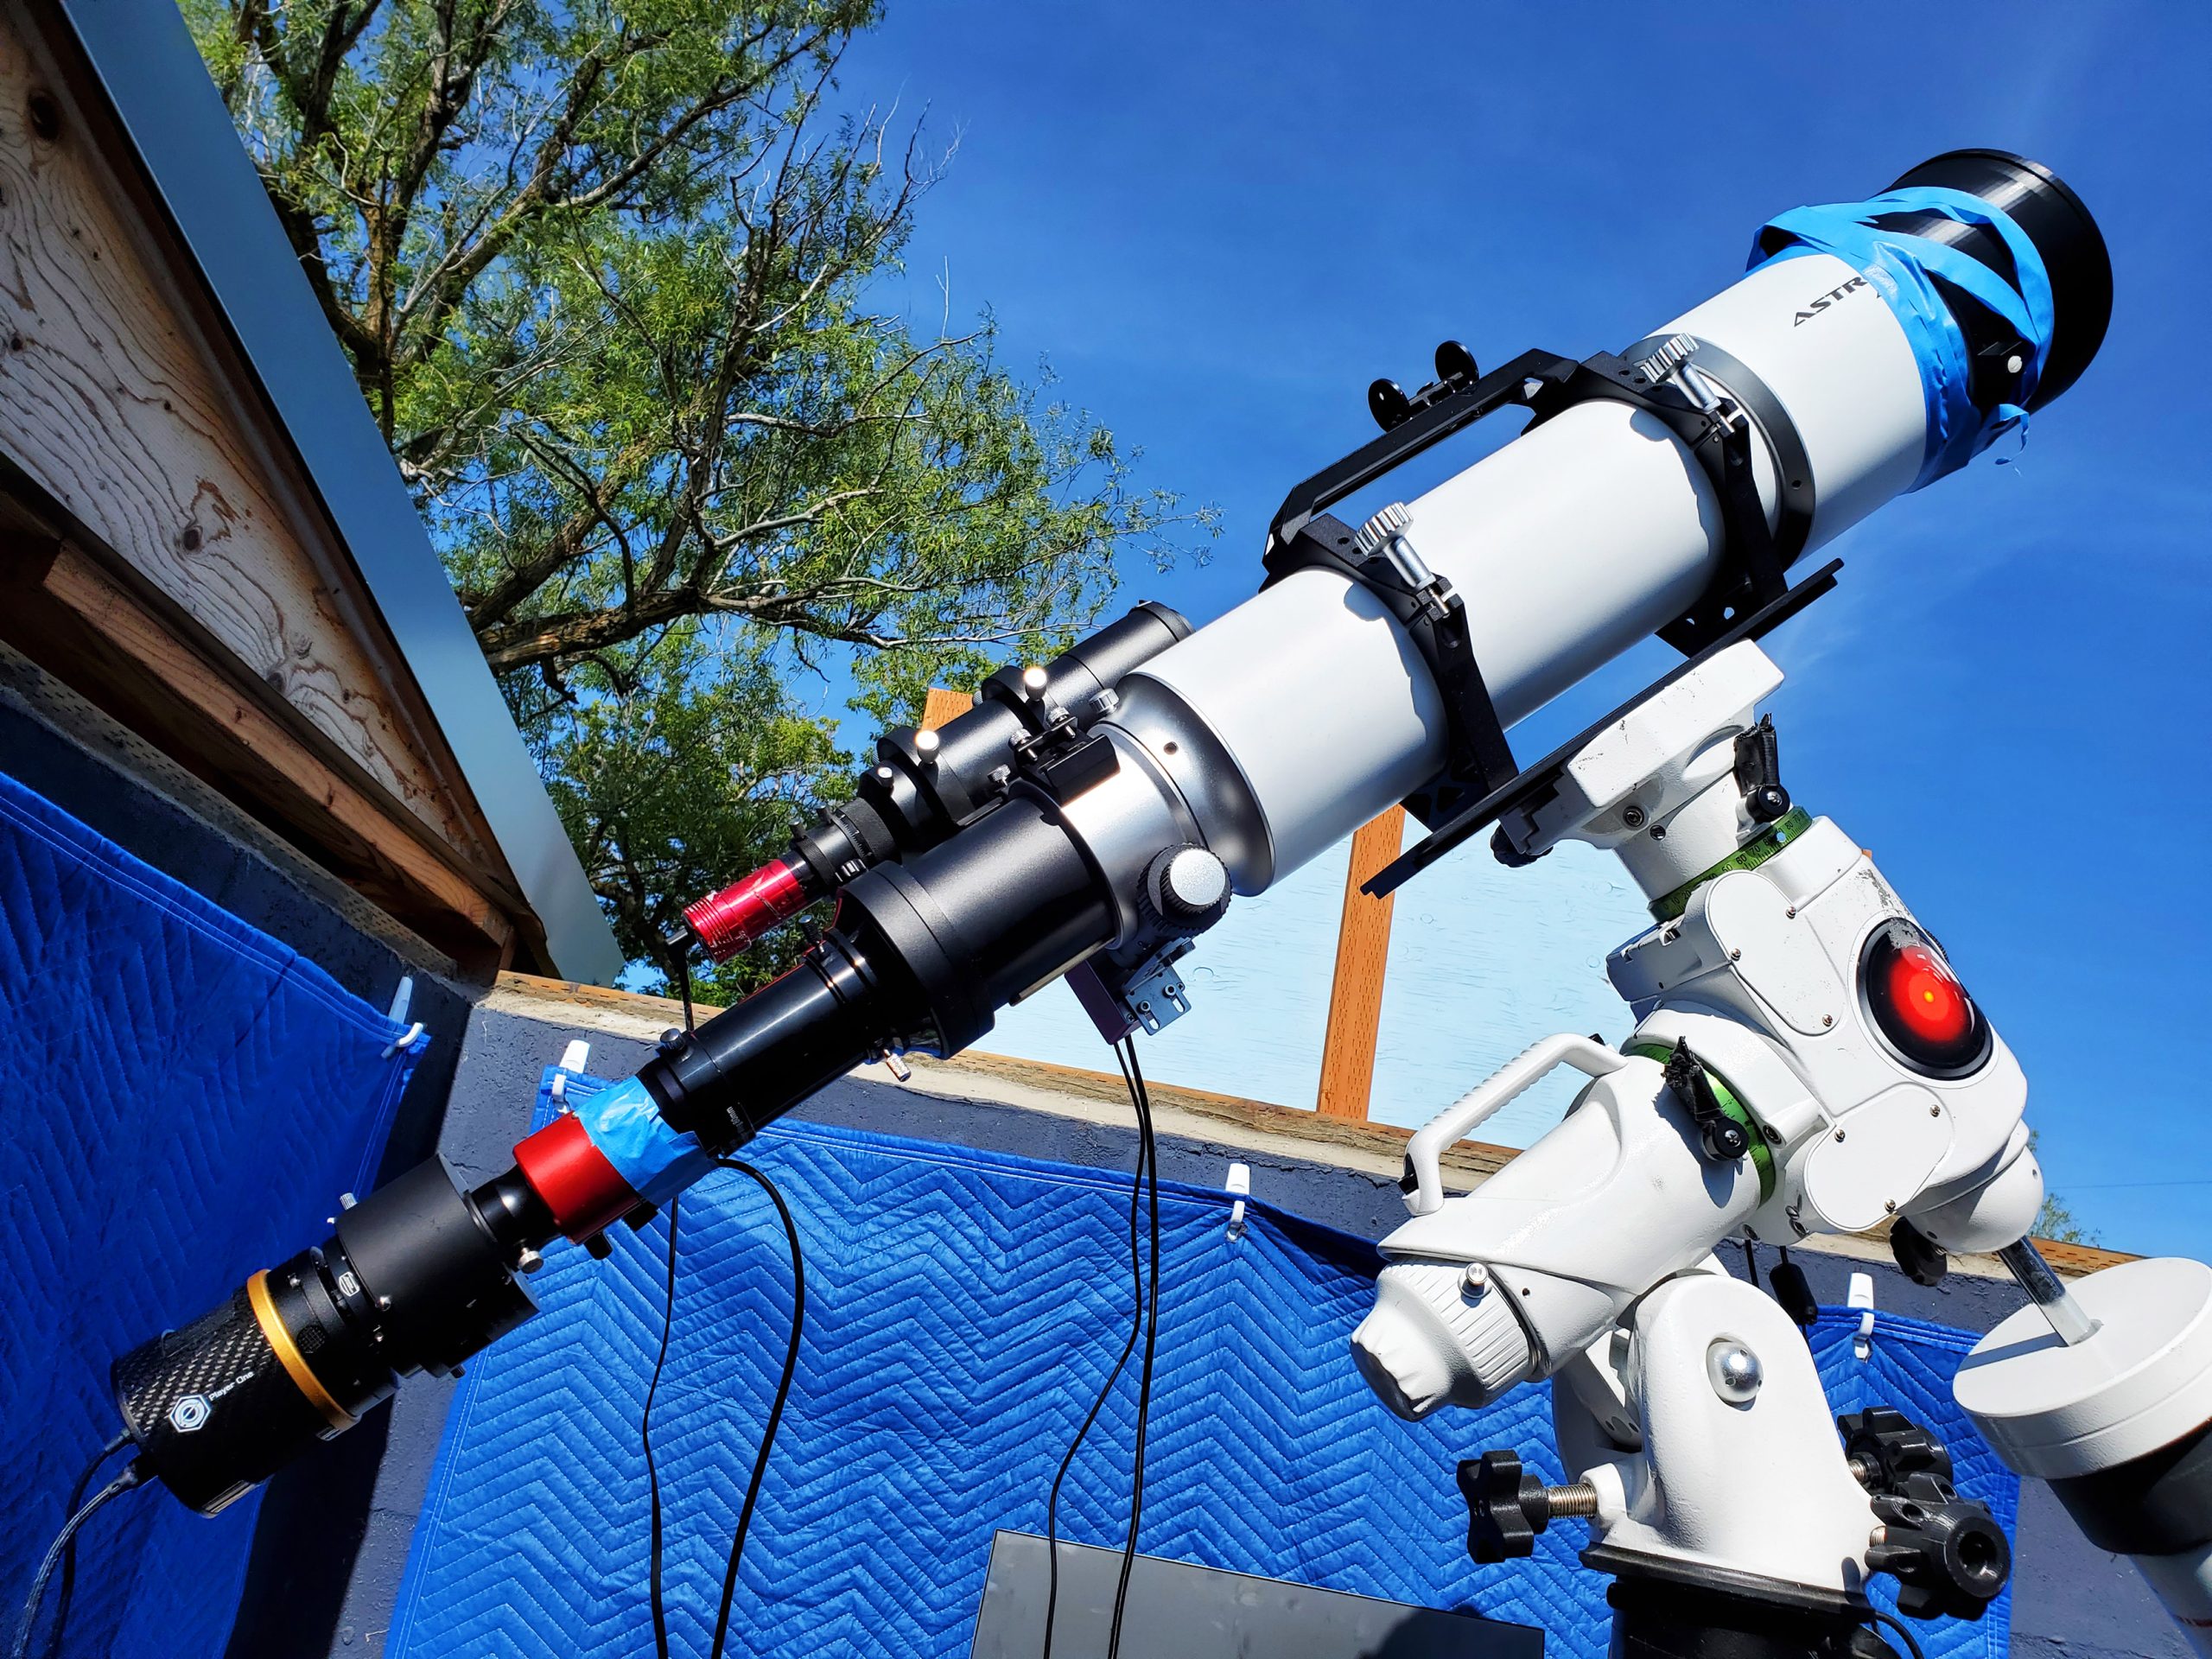
I put the pixel size on all my astro cams so I can see at a glance.
Adding a passive heat sink like this would probably improve solar lucky imaging, and maybe even lunar and planetary lucky imaging, on any camera. You would need to figure out where the heat is forming (likely at the sensor) and how to attach the sink there.
Some people say you do not need heat reduction for lucky imaging, but they usually do not know why they are saying it. That view also does not account for the existence of cooled lucky imaging cameras.
Cooling should help if you live in a hot place or if you do long time lapses. It certainly will not hurt at any time.
Materials
Aluminum heat sink (I used a cheap one)
Thermal paste (the one I recommend) Hex bolt that fits the threaded hole in the back of the camera
ISO alcohol and cleaning cloths
Drill bit slightly larger than the bolt
Small flat screwdriver
Hex key for the bolt
Let’s Do It
Remove the sticky backing from the flat part of the heat sink. I just rolled it off by pulling with my fingernail. If you do not have fingernails, the dull back of a butter knife works.
Measure the middle of the flat side of the heat sink and drill a hole for the bolt. There is a threaded hole in the back of the camera, and the bolt I listed fits it perfectly.
Drill the hole slightly larger than the bolt, going through from the back side. This will bend some of the heat fins, but you can gently bend them back into place with a small flat screwdriver.
Wipe off any metal burrs from the drilling. I did this outside on the porch over a board so the bits would not go everywhere.
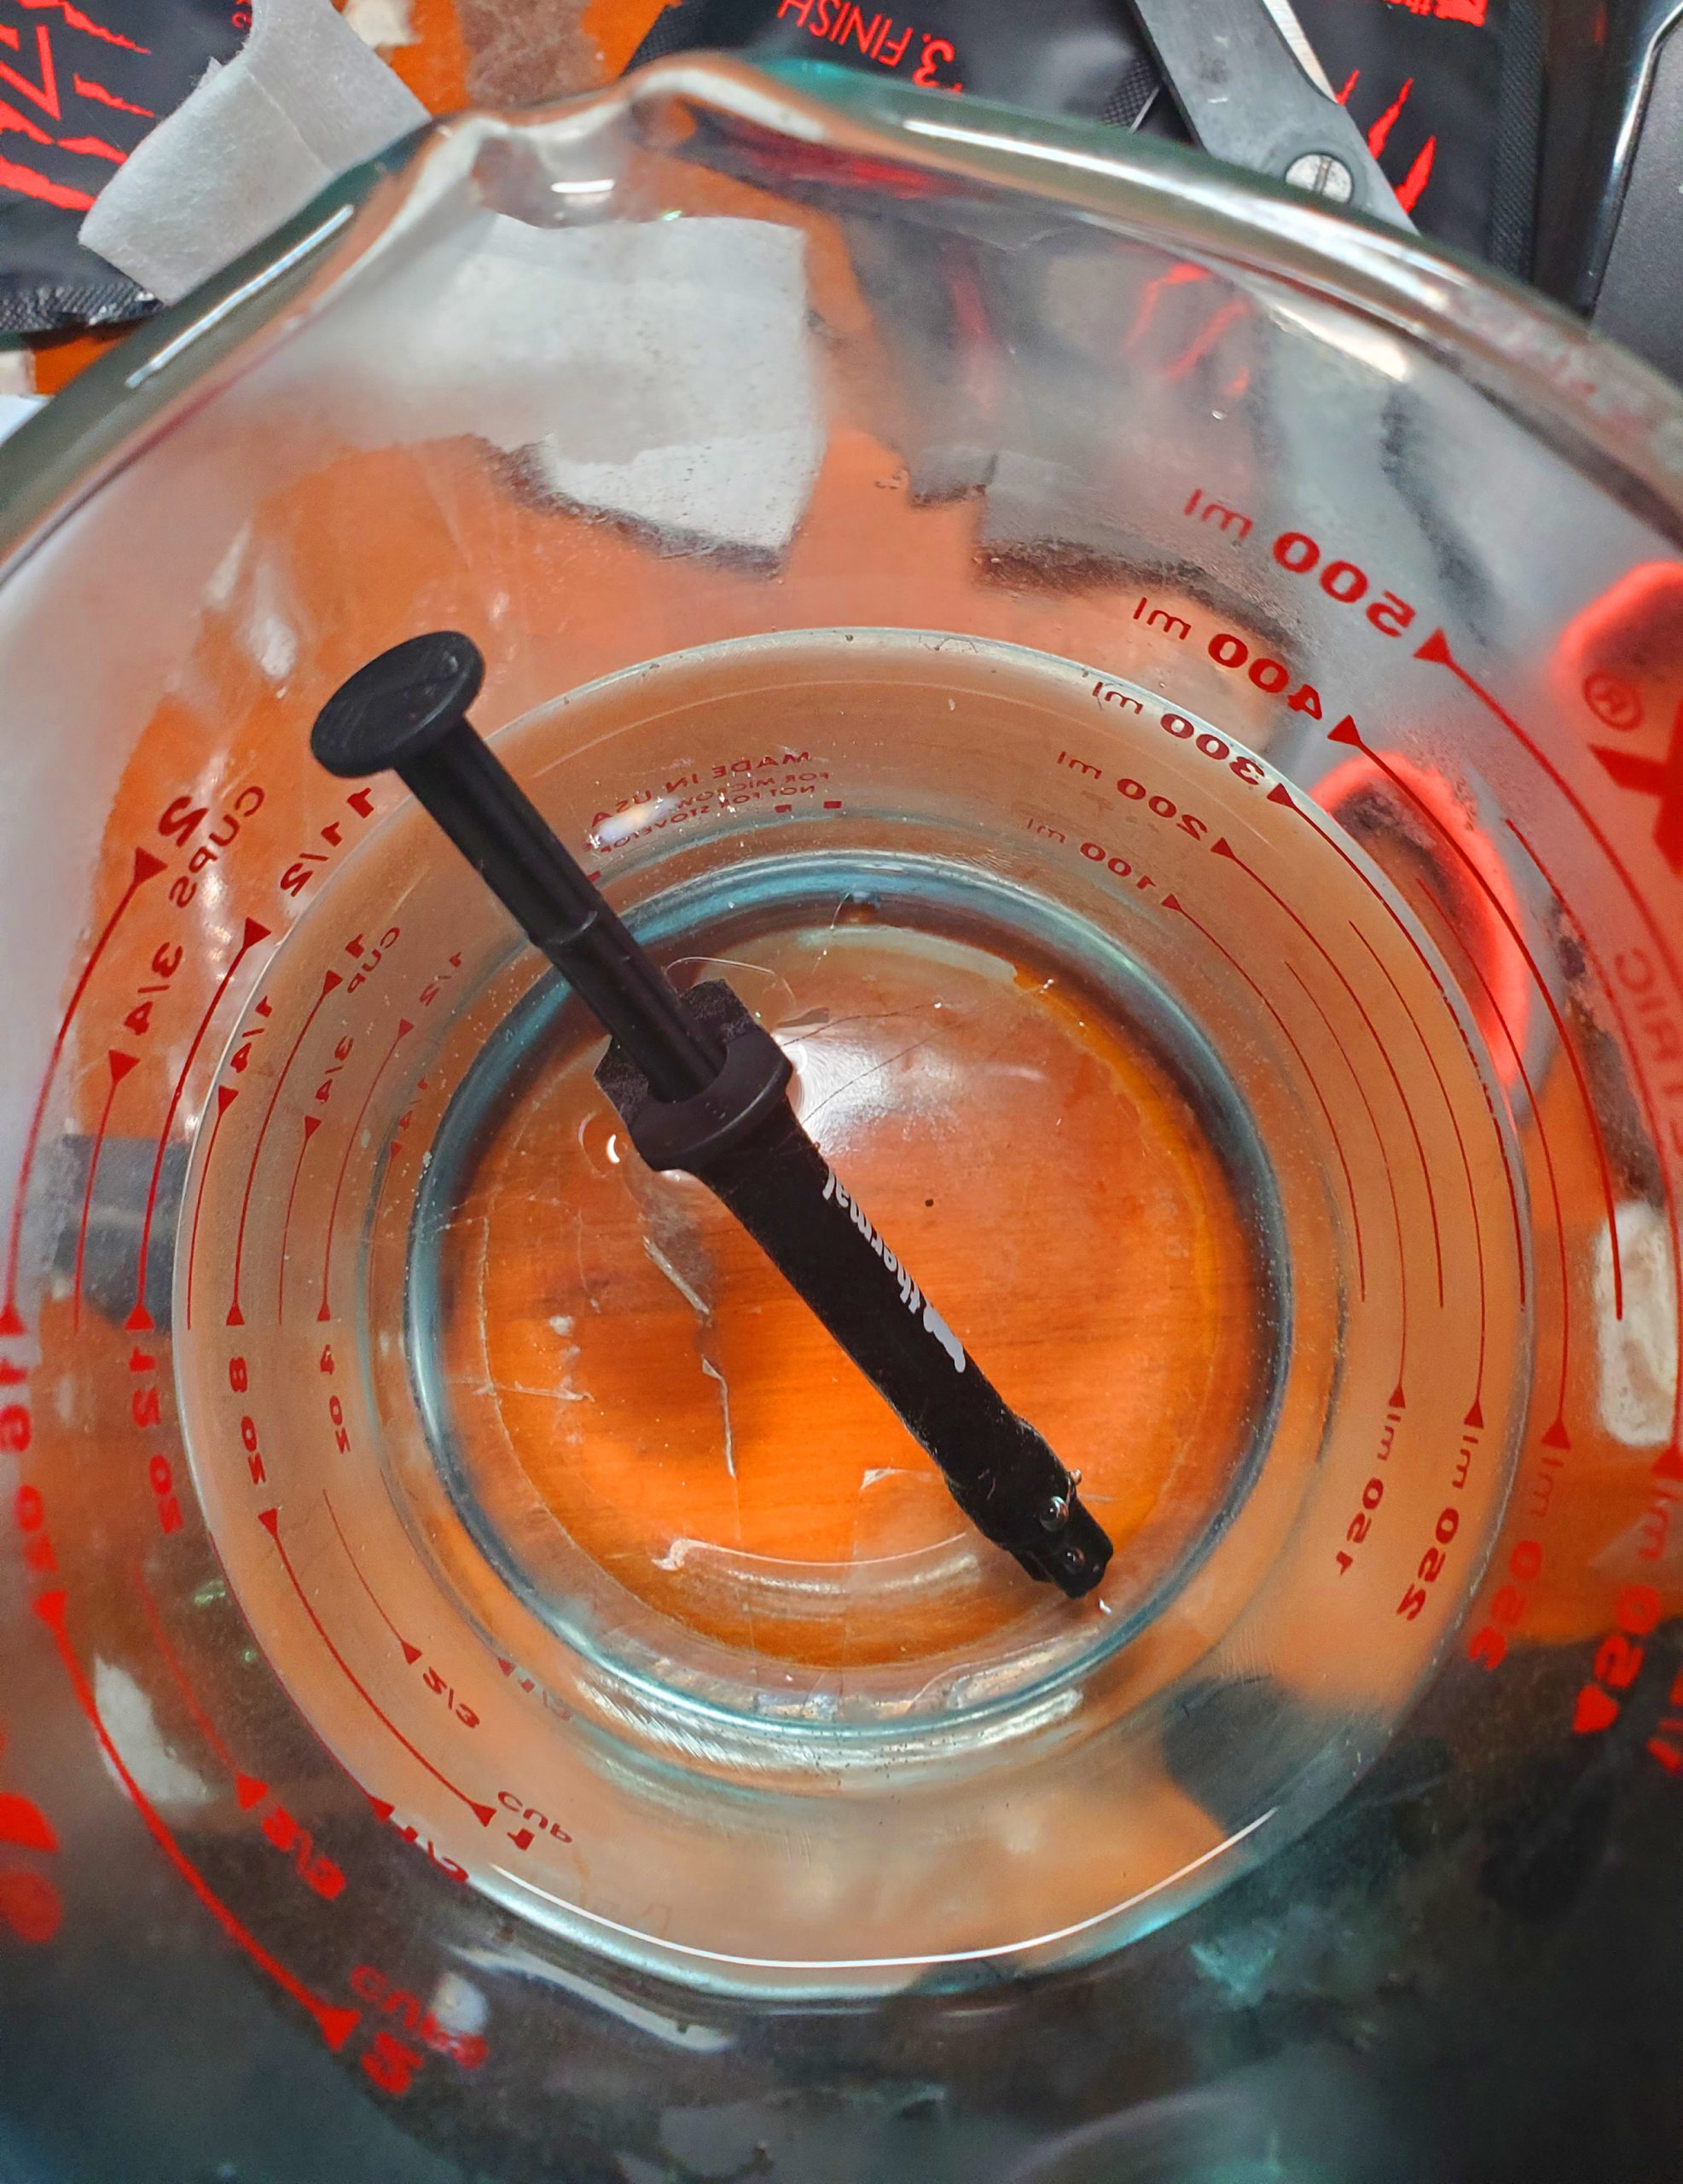
Then use the cleaning cloths that came with the thermal paste and a little ISO alcohol to clean the back of the camera and the flat part of the heat sink.Heat a cup of water to near boiling in a microwave-safe container. Let it cool slightly so it is not boiling, then drop in the thermal paste syringe for 60 seconds. This softens the paste to make it flow more easily.
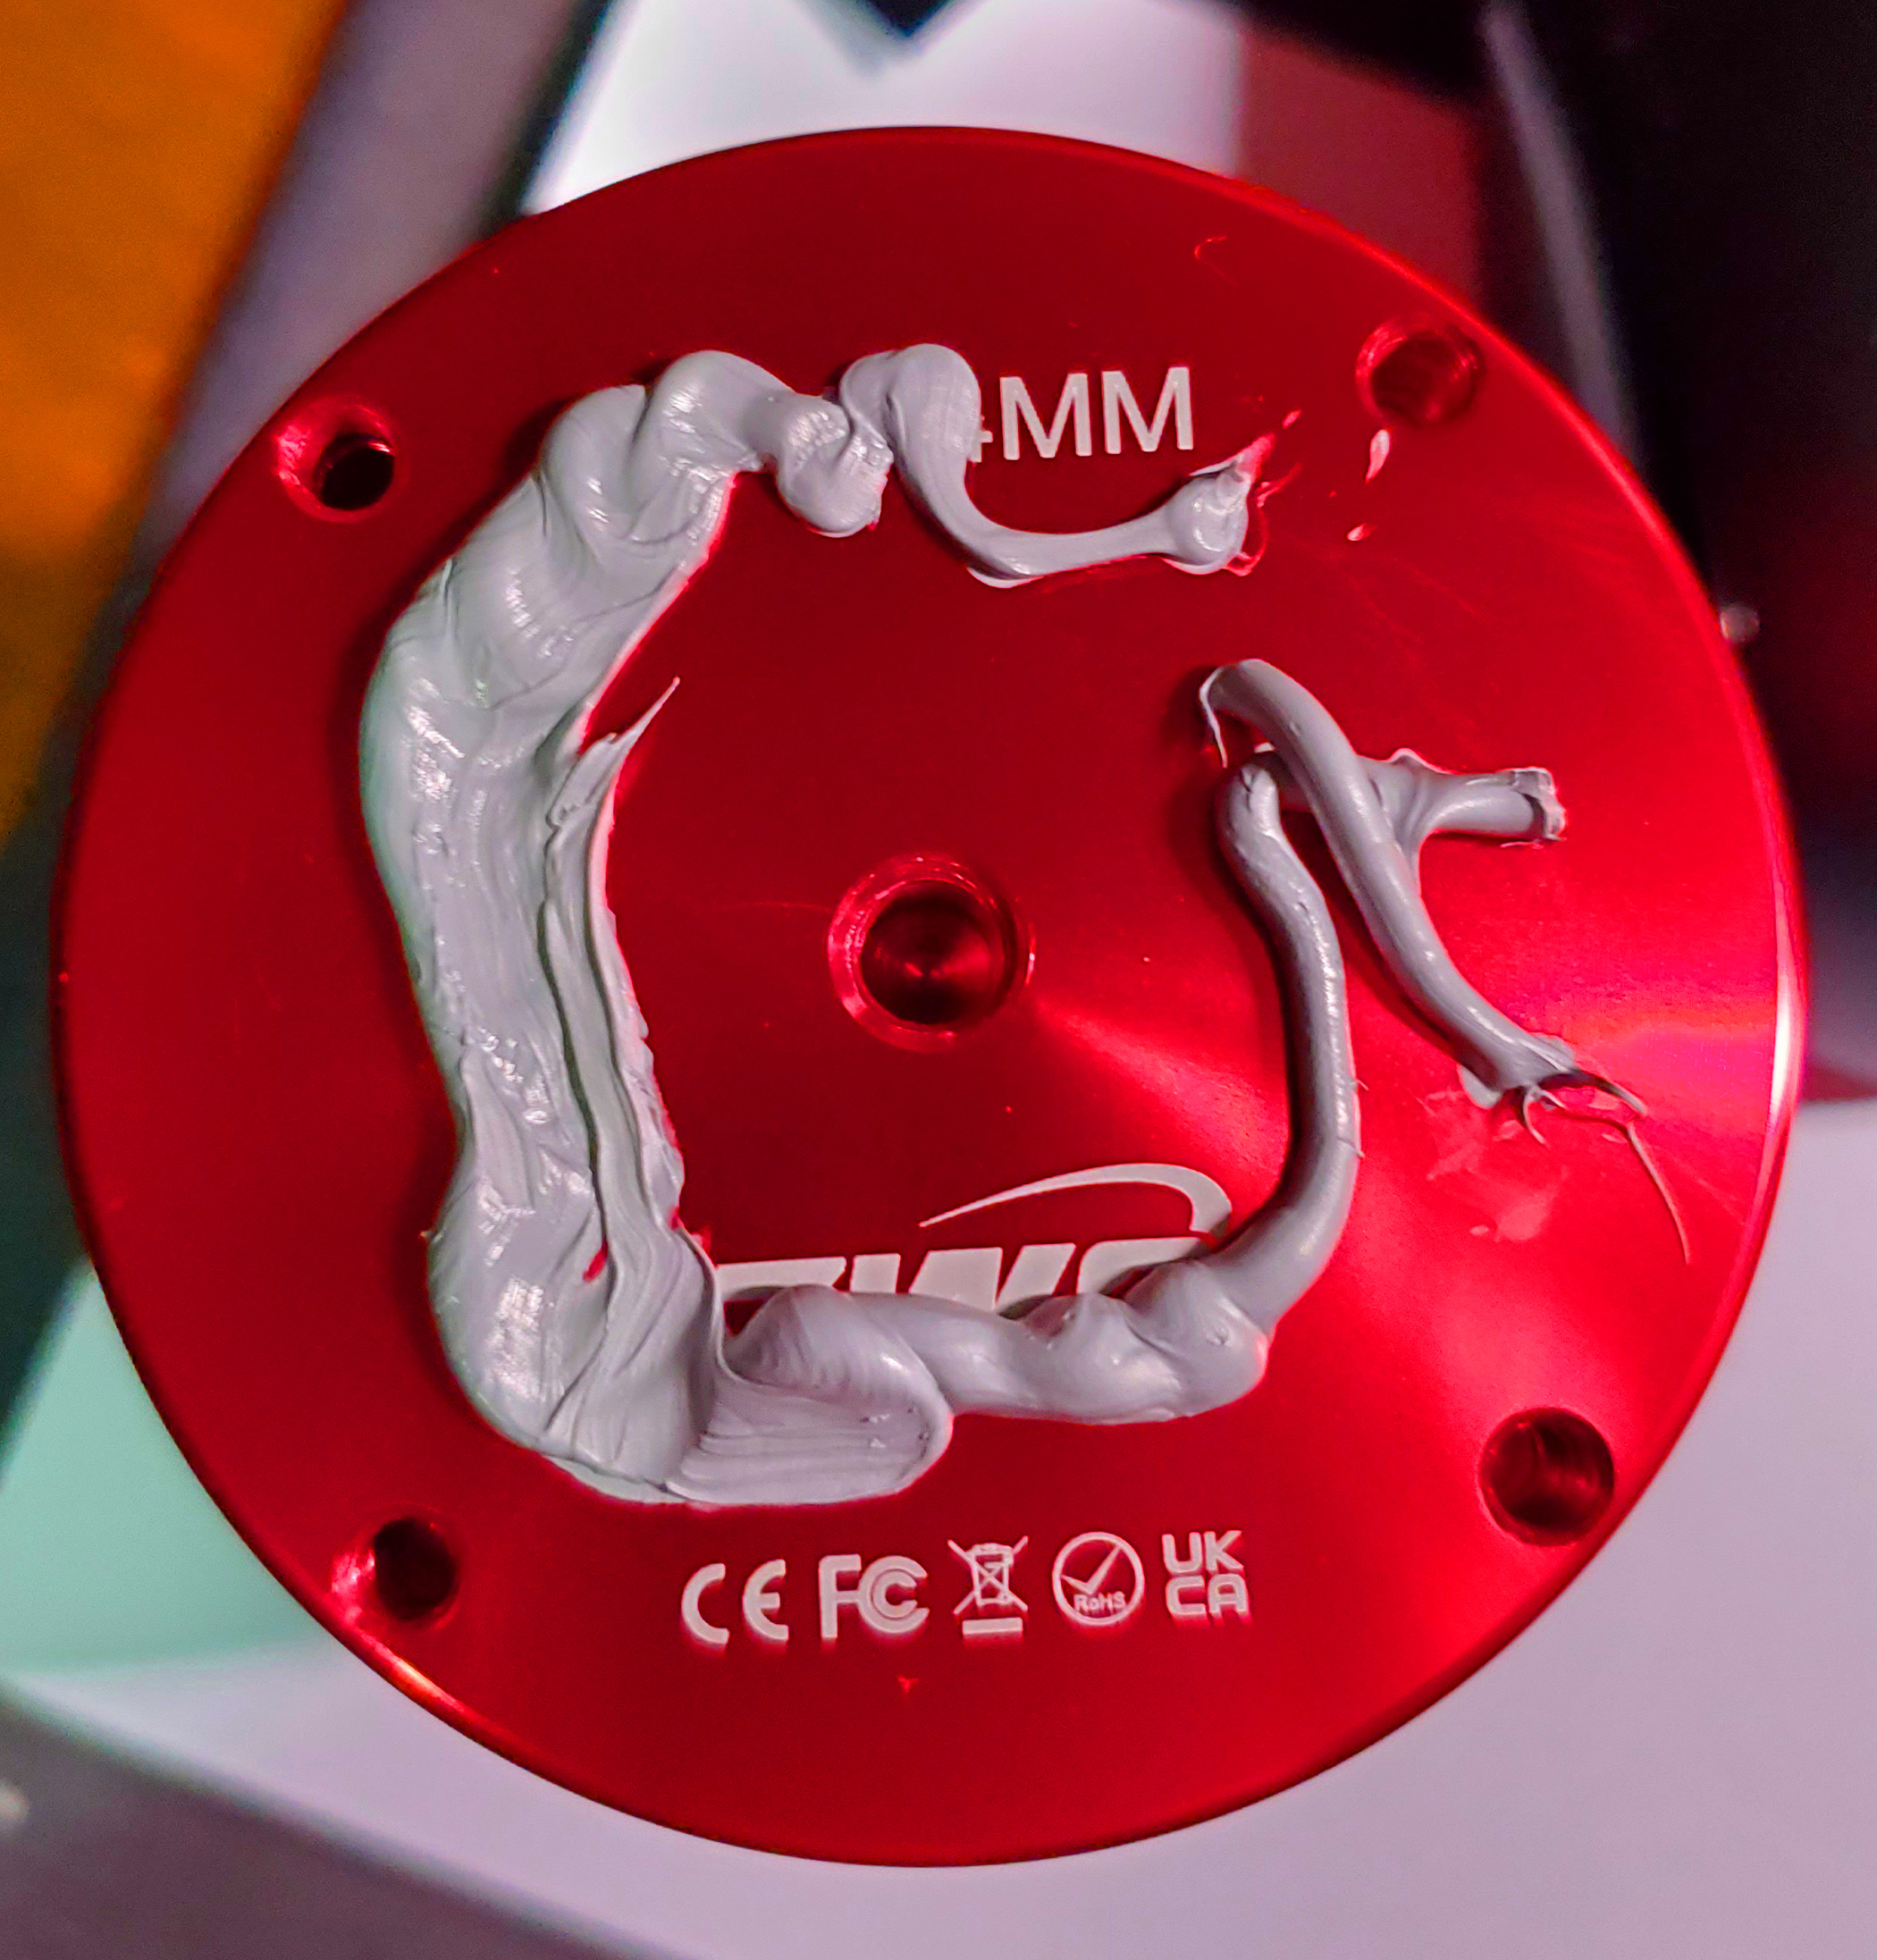
I removed the stick-on thermal pad that came on the camera and replaced it with the bolt and thermal paste. Thermal paste has much better heat conduction.
Squeeze the paste onto the back of the camera. I used the whole syringe but scraped a little off with the small plastic scraper that came with it. This helped spread it evenly.
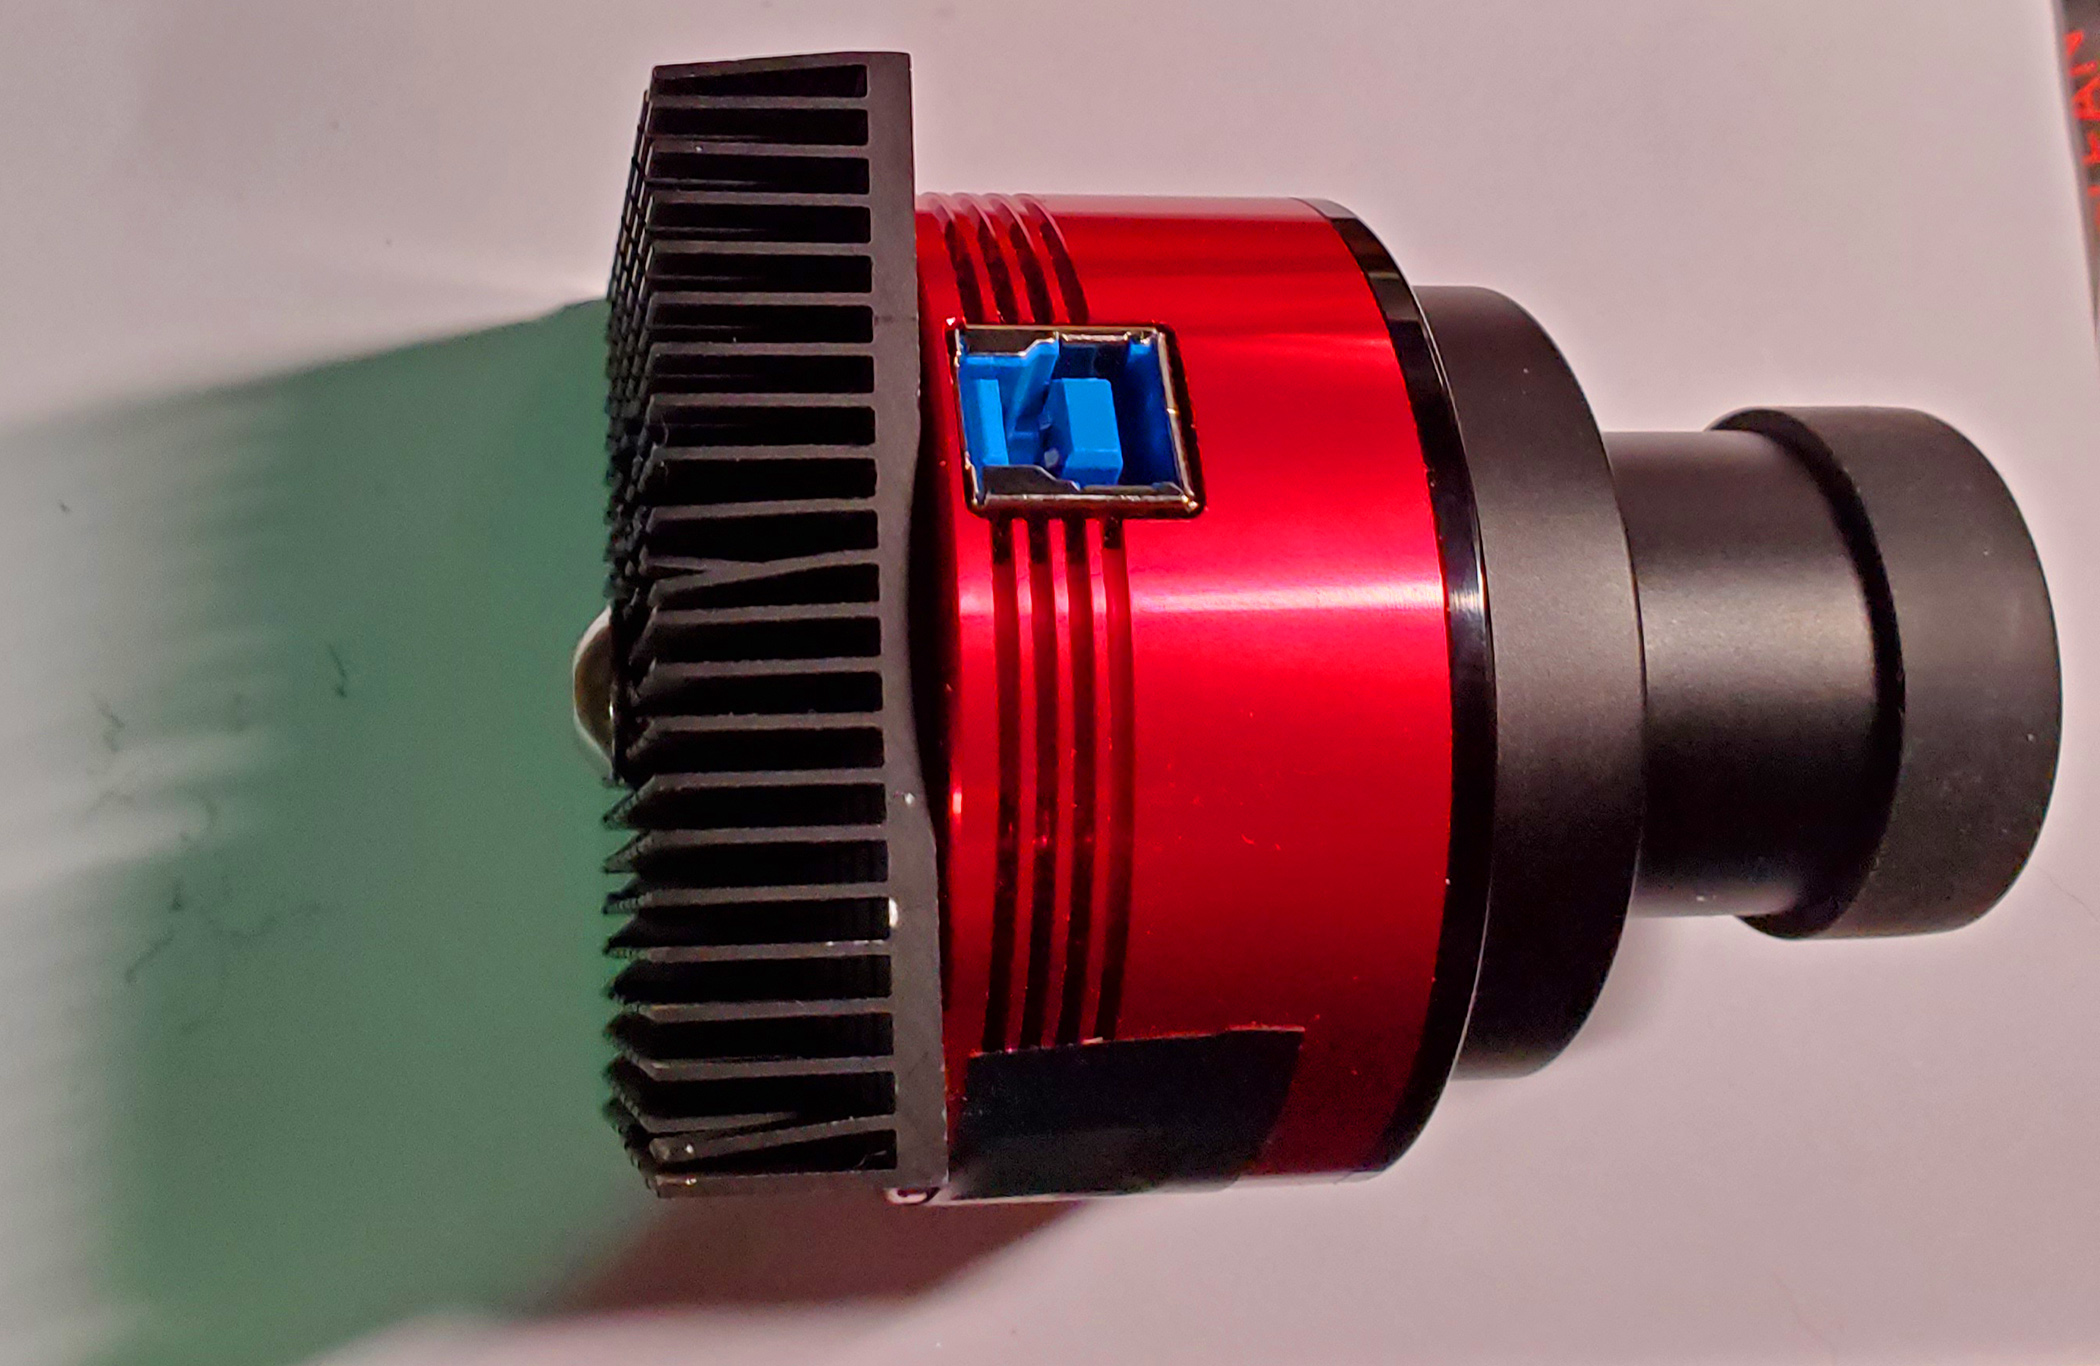
Screw the hex bolt through the heat sink into the camera until it is tight. You will squish a few fins, but that is fine. You want close contact for good heat transfer.
Additional Notes
Doing this may invalidate your warranty, so only do it if you plan to keep the camera. Bench test the camera first to make sure it works. I did.
Use the thermal paste I recommend. Some pastes will dissolve aluminum, but this one will not. Black aluminum is also a better heat conductor than the silver-colored kind.
Best common metal for a heat sink is copper, but it is expensive. Aluminum is next best. Steel is horrible.
I added a cheap aluminum heat sink to mine. I have not done formal darks testing with and without it, but touching the camera tells the story. It runs noticeably cooler with the sink. Adding one of these will reduce noise in your images. That is just how sensors work.
Paradoxically, the sensor gets hotter when shooting a smaller ROI because you get a higher frame rate.
Accurate darks testing to compare noise would require a climate-controlled chamber to keep the starting temperature the same in both tests.